Programming from A to Z
about
syllabus
All example source code
Notes on Deploying to EC2
Creating a server instance
- Go to the Amazon EC2 Page and sign up for an account.
- Navigate to the Amazon web services console.
- Click on “EC2” (top left of page).
- Select “Launch Instance”.
- Select “Ubuntu Server 14.04 LTS (HVM), SSD Volume Type - ami-5189a661”. (You are welcome to use others, but this one worked for me to run both node and Java.)

- Pick “General Purpose” (free tier micro)
- Select “Review and Launch”
- Launch!
- You’ll then see a prompt about your “key/pair”. The key pair consists of a public key that AWS stores, and a private key file that you store. They come together in a file “something.pem” which you will need in order to login to your account. Select “create new pair” and enter a title for your key/pair.
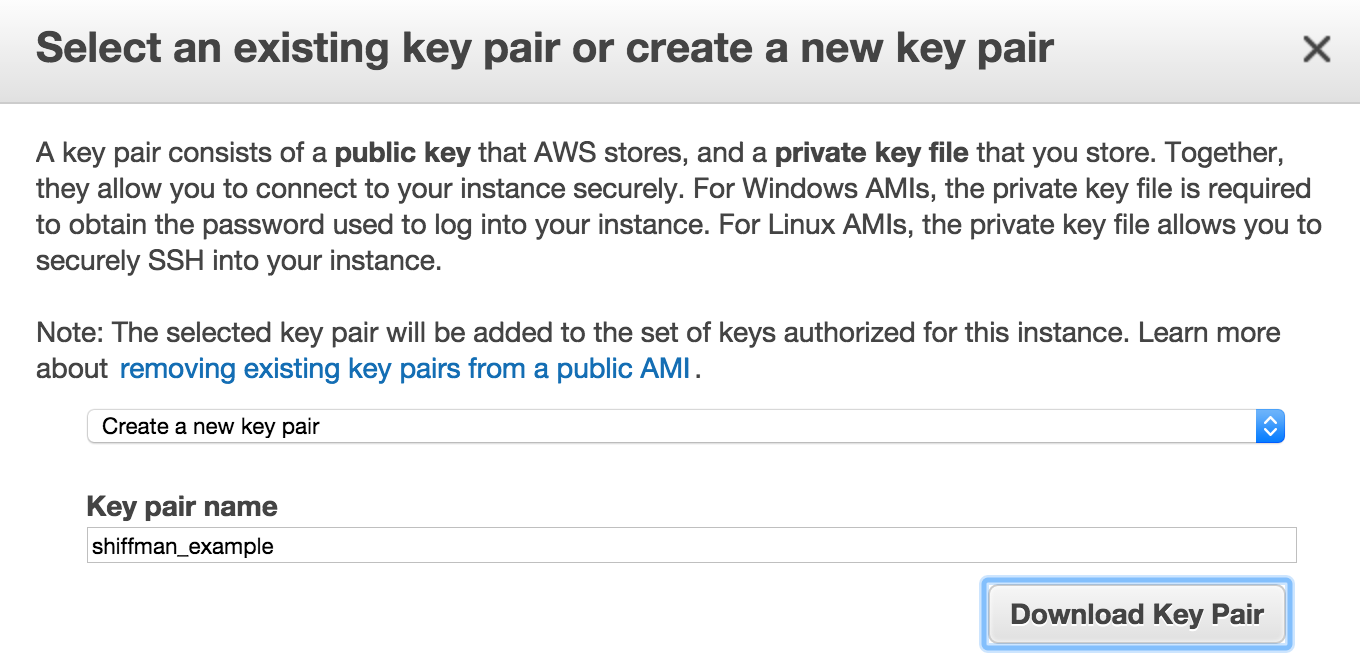
- Select “Download Key Pair”. The file will download to your computer. Save this file! You’ll need it for future steps.
- Now click “Launch Instances”.
- Now you should see a message that “Your instances are launching” (it may take a few minutes before they are available.)
- Select “View Instances”.

- You should see your instance listed like above. Now it’s time to connect!
- Navigate terminal to the directory where you have your “pem” file. First you must make sure your key is not “publicly” viewable. This has to do with file permissions.
$ chmod 400 yourkeyfile.pem- Login using the key with the following command:
$ ssh -i "yourkeyfile.pem" ubuntu@52.33.245.123Replace “52.33.245.123” with your “public IP” as shown in your EC2 console.
- Your terminal should then show that you have connectd.
Installing node and running your bot
- Install node:
$ sudo apt-get update
$ sudo apt-get install nodejs
$ sudo apt-get install npm
$ sudo ln -s `which nodejs` /usr/bin/node- Install the node package dependencies (specified in your package.json file):
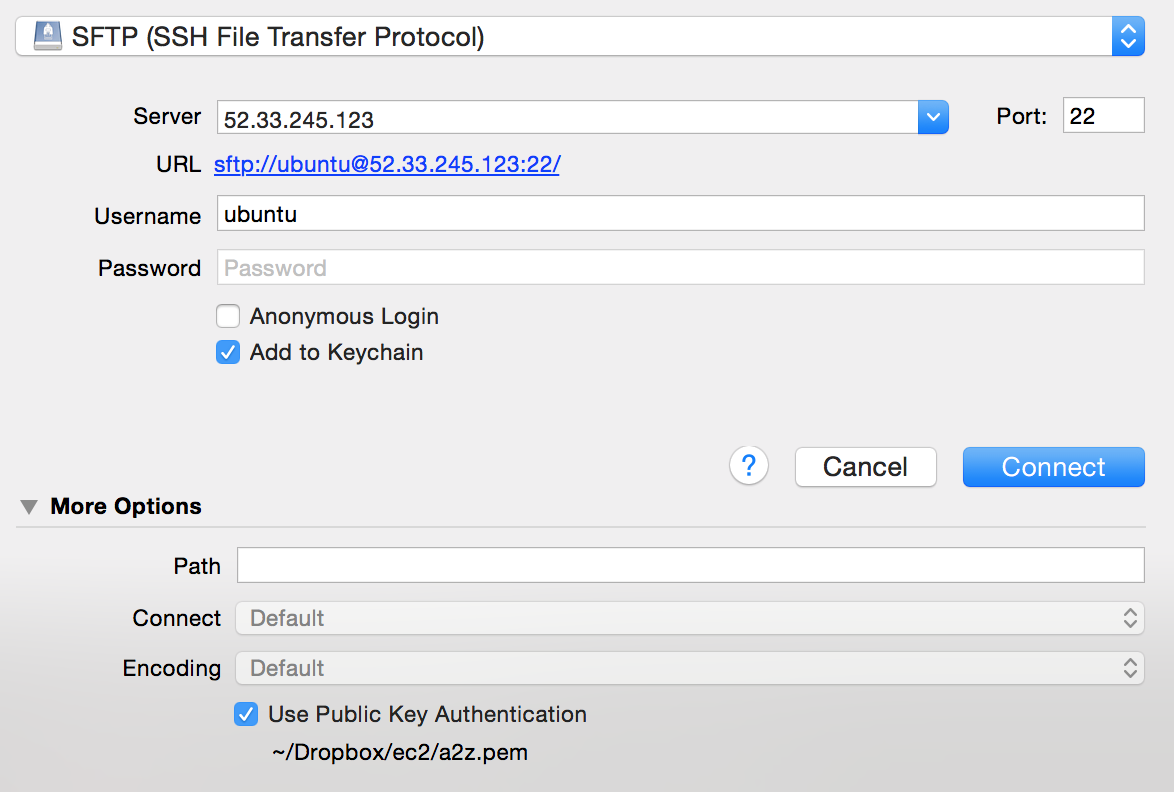
$ npm install- Upload your node application to the server. You can do this with SFTP software like Cyberduck. The key is selecting “Use Public Key Authentification” rather than enter a password. See the configuration below.
- Once your files are uploaded you’ll want to check and make sure your bot works, i.e.
$ node bot.js- The bot will only run while you have terminal open. In order for it to run after you’ve logged out of your EC2 instance and closed your computer, you can use a node module called “forever”.
$ sudo npm install forever -g
$ forever start bot.js
If you want to specify the logging files for any console output:
$ forever -o out.log -e err.log start bot.jsAnd you can also stop, restart, and list as follows:
$ forever stop bot.js
$ forever restart bot.js
$ forever list
$ forever stopall
Using Processing/Java
This comes from the headless Processing wiki.
- Install Java.
$ sudo apt-get install default-jreIt may be that the default JRE is not compatible in which case you can try:
$ sudo apt-add-repository ppa:webupd8team/java
$ sudo apt-get update
$ sudo apt-get install oracle-java8-installer- Install packages that create a “fake” display for Processing to render to.
$ sudo apt-get install xvfb libxrender1 libxtst6 libxi6- Create that “fake” display.
$ sudo Xvfb :1 -screen 0 1024x768x24
$ export DISPLAY=":1"
This will also only run for as long as you have terminal open. To have it run in the background while you launch your bot:
$ sudo nohup Xvfb :1 -screen 0 1024x768x24 &
$ export DISPLAY=":1"- Instead of using
processing-javayou can simply export your Processing sketch as a linux application from the PDE itself. You’ll end up with a “application.linux64” folder which is what you’ll want to include with your node app and upload. The node code can then instead be:
// You could use 'pwd' to determine the absolute path
var cmd = 'folder/sketchname';
exec(cmd, processing);- If your sketch needs to read from, or write to, the server, you may need to change the file permissions to allow it read/write. For example, with a linux application, cd into the application the folder and type:
sudo ./'your_applications_name'- If the application ran successfully, you should see the console output, provided you sketch has any. If not:
chmod 777 'your_applications_name'